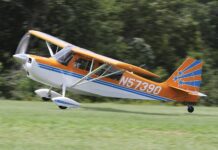
Most of us use airplanes to go places fast, or at least faster than other forms of personal transportation. Some of us use them to go slow, to check out the fall colors, to look for wildlife and other features on the ground or, being in no real hurry, because we can. Regardless of which mission you’re flying, each flight includes two segments when we’re at something close to the airplane’s minimum controllable airspeed: takeoff and landing.
288
But flying at minimum controllable airspeed can have other uses. For one, it’s a great way to teach a student how to handle an airplane when landing. For another, it can help even rated pilots hone some long-forgotten or disused skills. A third reason can involve checking an airplane’s control system and major surfaces for proper rigging or confirming its flight characteristics. And then there’s those pesky landings again, which we all try to perfect at one point or another. Flight at minimum controllable airspeed can mean different things to different people, of course, and there are many ways to practice and use such a skill. Let’s explore them.
Definition
First of all, let’s define what we mean by “flight at minimum controllable airspeed.” Importantly, this is not the same as a conventional twin’s VMC, or minimum control speed with the critical engine inoperative. See the sidebar on page 22 for a discussion of flying multiengine airplanes at their minimum controllable airspeed.
288
So, our definition: “Minimum controllable airspeed is a speed at which any further increase in angle of attack or load factor, or reduction in power, will cause an immediate stall.” Conveniently, that’s the FAA’s definition of minimum controllable airspeed, from the Airplane Flying Handbook, FAA-H-8083A. And “minimum” means minimum.
Planning
Like any other airwork, we need to plan how we’re going to do this: location, heading, altitude. We also need to establish what we’ll do when we arrive at the airplane’s minimum controllable airspeed. For example, will we perform any turns? If so, at what bank angle(s)? In what direction(s)? Since we’ll be doing all this with the stall warner operating, what’s the plan if it turns off; will we simply recover back to cruise flight, perhaps to try again, or correct the problem and re-establish minimum controllable airspeed? What about if we stall the airplane? The answers don’t matter as much as does the fact we’ve asked the questions and know what to do and what to expect. The same is true of any airwork.
For us, some of the answers are the result of having done this before. For example, we like to be in a practice area, away from normal arrival routes and/or approach procedures and clear of traffic. Additionally, we like at least 3000 feet agl when doing airwork in a high-performance single; 2000 feet is good for a simpler airplane. Ideally, the altitude will see little or no wind, and certainly won’t be gusty (a real minimum controllable airspeed demonstration should be on a calm day, so you can get really slow and stay there for a while). Finally, do this with a safety pilot—someone who knows what they’re doing—or with your favorite flight instructor. You never know when the extra set of eyes outside the airplane might help.
Execution
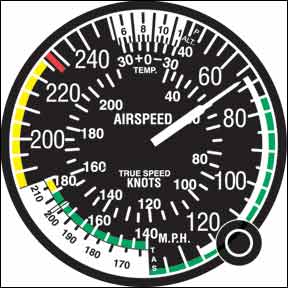
Once we’re in our practice area and at our desired altitude, we start with a pair of clearing turns, while we’re slowing down. Pull off enough power to decelerate into the airspeed indicator’s white arc. Lower the gear, if any, and turn on all landing and taxi lights. Since we’ll be in a relatively high-power, low-airspeed regime, engine cooling might be an issue. Open cowl flaps if you have them, and set the mixture as appropriate.
Lower full flaps; we prefer doing this incrementally so we have time to add some power and re-trim as control effectiveness and pitch control both change. Eventually, you’ll have full flaps out and will need to add power to maintain altitude. Don’t.
This is when you want to use the pitch control to slow the airplane even further. You may even have to reduce some power to get slow enough to get behind the so-called power curve, also known as slower than the airplane’s minimum drag speed. As you do, you should notice the pitch control is starting to get mushy. That’s lesson number one of our demonstration: As you slow down and approach minimum controllable airspeed, the controls get mushy.
Not only does it take more control movement to change the airplane’s attitude, the reaction happens more slowly. And the nose is way higher than normal. By this time, your foot should be tired from holding heading in a high-power/low speed situation, reducing rudder effectiveness.
Soon, you’ll be nibbling into stall territory, descending, or both. Smoothly add some power to arrest the descent and maintain back pressure. Now might be a good time to add some additional nose-up trim, if there’s any left. About this time, you should be seeing or hearing the stall warner. Don’t relax the pitch control. As it comes on steadily, smoothly add just enough power to keep it there. If you did this right, the airplane will settle right into a steady equilibrium, with the nose held high, altitude constant and the stall warner constantly activated.
Hold what you have. Now’s a good time to check the engine instruments to ensure things aren’t too hot. Maintain this attitude, altitude and heading, and you’re done.
Recovering
Remember how we defined minimum controllable airspeed above? The speed at which “any further increase in angle of attack or load factor, or reduction in power, will cause an immediate stall?” That’s where we are. How do we get out of this? Two ways.
First and best is to power out of it. Smoothly add full power and adjust pitch to maintain altitude. If there’s any power left, the airplane should accelerate and fly itself out of our minimum controllable airspeed demonstration. If not, and you don’t mind losing a couple hundred feet, gently lower the nose enough to accelerate out of the stall warner’s activation range. Doing so should accelerate the airplane enough to allow flap retraction. If not, and if you start pulling up the flaps, you’ll likely stall. Up to you.
Regardless, you may have to reduce pitch—and lose altitude to accelerate. And unless you stall the airplane, acceleration is the only way to get out of the minimum controllable airspeed configuration.
As the airplane accelerates, start the landing gear retraction cycle, if any. As drag is reduced, you might find it appropriate to reduce power.
If you haven’t already, now’s the time to reduce flaps a notch. As more air starts flowing over the controls, they’ll start to get crisper. You’ll probably need to re-trim as the airplane accelerates, often massively. Continue cleaning up the airplane and return to cruise flight. From here, what’s next is up to you: You can try this again, perhaps in the other direction, or go do something else. If you try it again, think about doing some of the maneuvers outlined next.
While You’re There
The minimum controllable airspeed demonstration is great for learning more about how the airplane feels and reacts at low speeds. It helps us prepare for landings and other maneuvers (see the sidebar on the opposite page) while building confidence in our ability to both perceive and react to the kind of low-speed/high-attack-angle situations from which stall/spin accidents are known to result. But we need to mix this up a little bit.
In the exercise we just finished, we maintained more or less straight-and-level flight. Let’s go back and do it again, but with more attitude.
Start by entering the slow-flight regime, as outlined. Once you’re there, execute a gentle 360-degree turn—no more than a 15-degree bank, please. Note how quickly the heading changes. That’s due to the slow speed at which we’re flying. Note also the amount of opposite aileron you’ll probably have to hold to keep the bank angle where you want it, and how altering your rudder pressure in the turn affects its quality.
Once you’ve done the 360 in one direction, do another the opposite way. Same deal with the ailerons, but the rudder is different, right. That’s the effect of torque and P-factor, both of which are more pronounced in this flight regime.
One more thing to do: Stall the airplane. Depending on what you’re flying and its performance on this day, you may not have enough pitch authority left to stall it by increasing the pitch angle. If not, maintain the attitude you have and slowly, smoothly reduce power a bit. Sometimes, you’ll find the airplane won’t stall readily, just mush and begin to descend. In that case, you may have to work a bit harder, using both power reduction and additional pitch to get a break. Careful with directional control: Getting the ball out-of-center or letting a wing drop gets you closer to a spin. This is, of course, a power-on stall, so be prepared for a less-gentle break than you may be accustomed.
Once you get a break, recover and clean up the airplane: You’re done. Move on to the next portion of your airwork.
What Have We Learned?
So, what’s the point of all this? For the average pilot, it’s a reminder of how and why we need larger control inputs in low-speed, high-attack-angle situations. It’s also a confidence-building maneuver, after which we know more about how the airplane reacts a low speeds.
Meanwhile, the sidebar above offers some practical applications, though there aren’t that many. Regardless, one primary benefit of the minimum controllable airspeed demonstration comes from helping recognize and analyze when the airplane is approaching its stalling speed/attack angle in everyday flight, no matter how much power is being used, what to do about it and how to recover. Someday, you may need this skill.

